Welcome › Forum › The Lounge › Winter Projects?
- This topic has 56 replies, 12 voices, and was last updated 11 years, 1 month ago by
moparkid25.
-
CreatorTopic
-
November 19, 2011 at 3:17 pm #5310
Amigo2k
ModeratorWell the cold nasty stuff is coming soon so it is time to think about winter projects …
Do you have any plans this year?
Are you looking for something special like this tiger with glowing red eyes for your third brake light (look for this sitting in my back window next year)

Or maybe you are looking for a new set of rims?
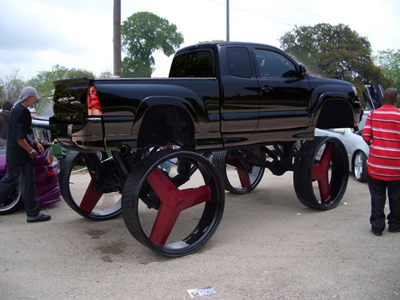
Or maybe a new prop for your car show display (hot trend for 2012):

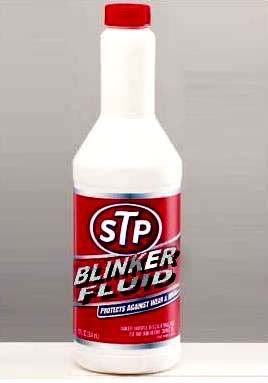
Or maybe a little maintenance (don’t forget to top off that blinker fluid):
-
CreatorTopic
-
AuthorReplies
-
March 15, 2012 at 10:04 pm #39055
jonmandude
ParticipantGood looking Monte Carlo!
March 15, 2012 at 11:36 pm #39551moparkid25
Participantintmdatr3 wrote:Really like that pistol grip shifter very nice look. This is the time of year we also do some updates on the Monte. This year we installed new headers ,replaced the plugs and wires,put in a MSD billet distributor and removed the cats. Also bought a set of brushed aluminum sheet metal for under the hood that I will install over the next couple weeks. Started the Monte up yesterday and broke the tv cable for the trans so this will have to fixed first before we can take a cruise.Every year do these little projects to keep my sanity while waiting for spring. Can’t wait for that first cruise have fun………I think I have an extra TV cable if you need one…. PM me if so.
March 16, 2012 at 5:36 pm #39056intmdatr3
ParticipantThanks for the compliments. Thanks for the offer I had to get one that is longer to fit around the SLP intake runners I also put on. This made some hookups to short this should fix that. Thanks for the offer.
Attachments:
March 23, 2012 at 5:17 pm #39057Blown69RS
Participant“Befores” on the left, and “Afters” on the right…


.
some in-process projects:


.
.March 24, 2012 at 12:09 am #39598ModeratorWow lots of great custom pieces! Where did you get the window cranks from?
March 24, 2012 at 1:21 am #39599ParticipantThanks.
Window cranks are by Clayton Machine Works. They’re carried by quite a few places, or they sell them direct. I picked them up from Classic Industries, only because of being in-stock, and a promotional discount at the time.
Manufacturer home page:
April 4, 2012 at 1:31 am #39600ParticipantNot quite a “winter” project, more like early spring
I am just fitting these parts right now. I have to spend the next few days painting, color sanding, clear coat and buff.
Firewall cover. To be gloss black. I am hoping to get a mirror-ish finish

Then ABS cover. To be body color. I hope the paint I have matches close, if not I will have to go to Body Shop Supply and get some paint that does.
 April 7, 2012 at 4:56 pm #39643Participant
Nice metal work should look very nice.
") April 24, 2012 at 2:34 am #39656Participant
April 24, 2012 at 2:34 am #39656ParticipantPainted and in. And yes, I had to have Body Shop Supply make me some PCP spray paint. I also had to paint the mirror black, not once, not twice, but thrice. The first time looked good but I got impatient and left a fingerprint. The second time I tried a wrinkle finish. It looked good but not what I wanted. Third time is the charm.
 April 24, 2012 at 4:09 pm #39711
GTO Man
ModeratorLooks great.
April 24, 2012 at 4:15 pm #39713ModeratorIs that a kit you bought and then painted or did you have to custom make it yourself?
April 24, 2012 at 10:57 pm #39714ParticipantThey are from a company named 3G Customz. The parts are basic and have to be trimmed to fit properly, then painted.
April 28, 2012 at 6:34 pm #39716ParticipantGot quite a bit done on the GN over the winter. First, I was able to locate a used ATR 3″ singleshot exhaust with a Magnaflow muffler from a guy in NJ via TurboBuick.com. The price was right, and we worked a deal on shipping. I got the parts, polished the muffler, and then scuffed and painted the tailpipe and intermediate pipe with VHT aluminum finish paint. I also installed the LS1 mass air sensor and MAF translator, so it is compatible with my onboard software. Next was an air divider plate between the plenum and intake manifold. They come from a company called RJC, and they call it a powerplate. It is designed to equally distribute the airflow into the intake, and is good for another 2psi of boost.
As far as mechanical issues, I’ve had a problem sealing the oil pan gasket since the engine was rebuilt. I got a cork gasket (OEM gasket is rubber) from RJC and a different oil pan. Got it installed this week and so far so good, but I’ve only driven from the shop to home :whistle: During our warm spell, I did get the majority of the car detailed from its winter slumber, but I have to do the engine bay. Got some other work to do in there yet, so I’ve been putting it off. Other than recharging my AC (already converted to R134a), fixing my cruise control, I need to fix my windshield wipers. RainX only goes so far :whistle:
With all my other mods, it will be diffucult to compete in a stock class anymore. I am hoping for a track visit at least once this year, so I can break into the 12s. Still looking for some hook for the rear wheels though…
January 12, 2013 at 2:59 am #39749ParticipantAnother year and another winter. What is everyone doing this winter for projects?
I have many parts from my interior currently being “hydro-dipped” by a company in Oregon…the state of.
If any of you saw my interior last summer, I had the cheap stick-on vinyl kit that was supposed to simulate woodgrain. My hope was that it would resemble the classic Challengers’ interior with the woodgrain they had. I liked the theory, just hated the way the vinyl looked. It looked like it was, fake and cheap. Even though a good kit costs between $220-$300, and you always have many pieces that you don’t use.
I have seen a few painted interior pieces (plumcrazy has his painted and it looks nice) but it doesn’t fit the look I wanted. I checked into doing a vinyl wrap, like they do on cheap pressboard furniture. Again I was worried about it looking like cheap furniture.
A few years ago American Chopper had an episode where they built a dirtbike and had the pieces dipped in a real camo look. It looked like a neat idea. I did some searching to see if I could find out more. I found out it was called “hydro-dipping” or “water transfer printing”. Really cool stuff. I did more research and could not find anyone in Wisconsin who does this, but found a few in other areas that do. There is hundreds of patterns to choose from. Almost any color and many different patterns, carbon fiber, camo, and skulls are the most popular. I looked into woodgrain and found that there are patterns that simulate almost every type of wood. Oak, walnut, cherry, teak, and burlwood in many different shades and grain.
I contacted a few companies and the response was that you can “dip” anything, except electronics. I was quoted prices usually between $250-$500 to do what I wanted done. Most said “4 to 6 weeks”. I know it is winter and our cars are in storage so that time isn’t an issue, but…
Then I found HGI, Hydro Graphics Inc. If you watch college football you have seen their work. The Oregon Ducks have the most colorful uniforms and very unique helmets. Well guess who does the helmets? If you have been to any sporting goods store and looked at Nike water bottles in colors and patterns, yep HGI again. They have contracts with the NCAA for many team’s helmets and with many companies, like Nike, to do “dipping” on their products.
I contacted HGI about what I wanted done and the pattern I was interested in. They quoted me a price of $0.28/sq inch and a time of 7-10 days. Wow! quicker than others and much more reasonable too.
I took my gauge cluster, radio surround, shifter surround, door pulls, steering wheel inserts, and shifter handle (the pistol grip is already woodgrain but I want it all to match), cleaned up the vinyl stick-on crap (boy! that stuff sticks!), painted the pieces all in a primer, wrapped it all in bubble wrap and shipped them out. They got the parts on January 2nd and called me. It seems we did not discuss finish. I guess after the parts are dipped, they get a couple coats of a clear. What finish did I want? While a high gloss would look impressive, it would not go with the retro theme I want. So satin finish it is.
There was great deal of trust from me in this, and them too. No actual price has been quoted, only a per sq inch. Today I received an email. The parts are going into clear and will be shipped out next week. Price? $189.84. The most expensive piece was the gauge cluster at $78.40. Not bad.
I will post pictures when I get the parts.
January 13, 2013 at 8:18 pm #41121ModeratorI’m having my air cleaner lid re-chromed at a place in Madison.
It is suppose to be done, and I’m going to pick it up this week… I’ll post some photos and thoughts on it when I get it back …
-
AuthorReplies
- You must be logged in to reply to this topic.